Candle and soap making are creative and rewarding hobbies that allow you to craft personalized products right in the comfort of your own home. Whether you're looking to make unique gifts, add a personal touch to your home décor, or start a small business, making candles and soaps can be a fun and fulfilling process. With the right materials and techniques, anyone can create beautiful, handcrafted items. This guide will walk you through the essentials of getting started with candle and soap making, ensuring you have all the tips and tools needed to succeed.
Essential Supplies for Candle and Soap Making
To start your candle and soap making journey, it's important to gather the right materials. For candle making, you'll need wax (soy, beeswax, or paraffin), wick, fragrance oils, dyes, and a heat source for melting. Many crafters recommend using a double boiler to safely melt the wax. You'll also need containers like glass jars or metal tins to pour the wax into and set the wick properly. For soap making, the two most common methods are cold process and melt-and-pour. The melt-and-pour method is beginner-friendly and involves buying pre-made soap base that you melt and add your ingredients to. For both methods, essential oils, colorants, and molds will help you customize your creations.
Step-by-Step Candle Making
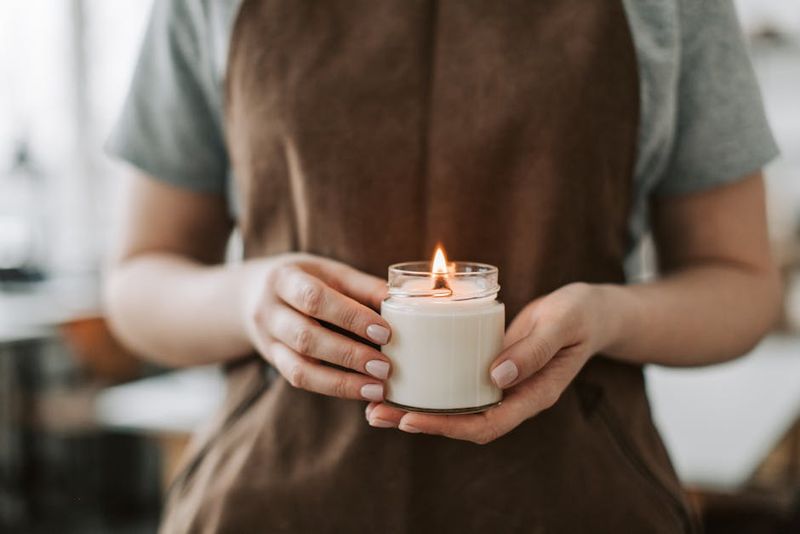
Once you have your supplies, it’s time to start crafting your candles. Begin by melting your wax, making sure to monitor the temperature to avoid overheating. While the wax is melting, prepare your container by securing the wick to the bottom with a bit of melted wax or wick stickers. Once the wax has reached the desired temperature, add your fragrance oils and dyes, stirring gently to ensure even distribution. Carefully pour the wax into the container, leaving a little space at the top. Allow the candle to cool and harden, which can take several hours. Trim the wick to about 1/4 inch above the surface before lighting your candle. The process is simple, yet the results can be stunning and aromatic.
Step-by-Step Soap Making
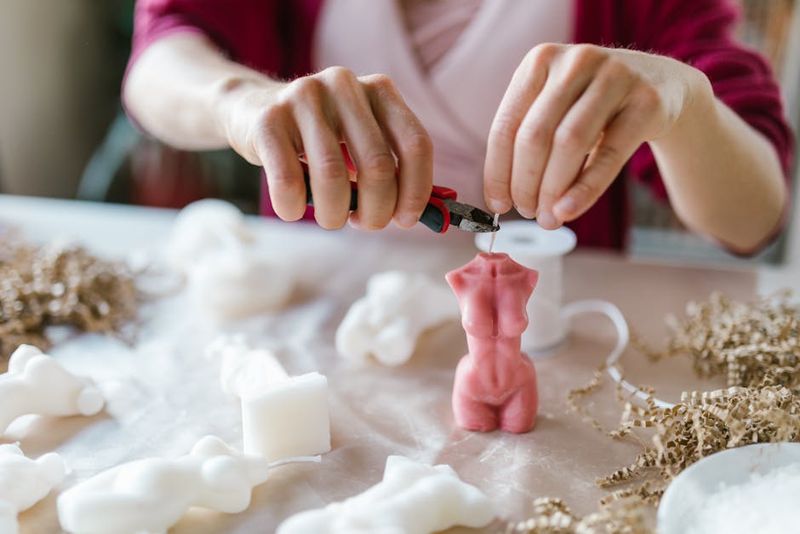
Soap making is just as enjoyable, but it requires a bit more attention to detail. For melt-and-pour soap, begin by cutting your soap base into small chunks and melting it in the microwave or over a double boiler. Once melted, you can add your fragrance oils, colorants, and any extras like dried flowers, herbs, or exfoliants. Stir the mixture well before pouring it into your soap molds. Allow the soap to set for several hours or overnight. If you’re opting for cold process soap, be aware that it involves handling lye, which requires extra safety precautions. After mixing the lye with water and oils, pour it into molds and let it cure for 4-6 weeks. Regardless of the method, making your own soap allows for endless customization and a sense of accomplishment when you see your finished products.
Discovering Unique Fragrance Combinations for Candles
One of the most exciting aspects of candle making is experimenting with different fragrance combinations. You can create a signature scent that reflects your personality or seasonal themes. Consider blending fruity notes with floral undertones or combining earthy scents with spicy fragrances. A popular approach is to start with a base scent and layer different fragrances to build complexity. Remember to keep track of your recipes, as some combinations may lead to delightful surprises while others might not yield the results you expect. Testing various combinations can be a fun way to enhance your candle-making skills and discover new favorites.
Understanding the Science Behind Soap Making
Soap making, particularly the cold process method, involves a fascinating chemical reaction known as saponification. This process occurs when fats or oils are combined with an alkali, usually lye, resulting in soap and glycerin. Understanding this chemical reaction is crucial for ensuring your soap's success, as incorrect ratios can lead to failed batches or unsafe products. It’s essential to measure your ingredients accurately and to follow safety protocols when handling lye, as it can be caustic. With practice, you’ll gain a better grasp of how different oils affect the properties of the final soap, allowing for even more customization and creativity in your projects.
The Importance of Curing and Storing Your Soaps
After making your soap, the curing process is vital for achieving the best results. Cold process soaps should cure for 4-6 weeks, allowing excess water to evaporate and the soap to harden. This process also allows the saponification reaction to complete fully, ensuring that your soap is safe and effective for use. During this time, store your soaps in a cool, dry place, away from direct sunlight, to prevent any discoloration or damage. Properly cured soaps will have a longer shelf life and better lather, making them a joy to use. Once cured, you can package your soaps beautifully for gifts or personal use, enhancing their appeal.
Creative Ways to Personalize Your Candle Designs
Personalizing your candle designs can add a unique touch that makes them even more special. Consider embedding decorative elements like dried flowers, herbs, or glitter into the wax. You can also create layered candles using different colors and scents for a visually striking effect. Experimenting with various container types, such as teacups, mason jars, or even decorative tins, can elevate the aesthetic of your candles. Additionally, labeling your candles with custom designs or names can make them perfect gifts for friends and family. This personalization process not only enhances the visual appeal but also allows you to express your creativity and style.
Starting a Small Business with Your Candle and Soap Creations
If you've developed a passion for candle and soap making, you might consider turning your hobby into a small business. Begin by creating a business plan that outlines your target market, pricing strategy, and marketing approach. Research local regulations regarding the sale of homemade products, as some areas have specific labeling and safety requirements. Building an online presence through social media platforms can help you showcase your creations and connect with potential customers. Participating in craft fairs or local markets can also provide opportunities to sell your products directly and gain valuable feedback. With dedication and creativity, your hobby could blossom into a successful venture.
AI-Assisted Content Disclaimer
This article was created with AI assistance and reviewed by a human for accuracy and clarity.